How to Navigate the Final Walkthrough of a Pre-Construction Condo

Quick Summary
- Treat the walkthrough as verification: match plans, finishes, and options
- Arrive with a punch-list system, photo evidence, and clear acceptance criteria
- Prioritize water, HVAC, windows, and electrical before cosmetic items
- Lock timelines in writing: who fixes what, by when, and how reinspection works
Why the final walkthrough matters more than the design center
By the time you reach the final walkthrough, the emotional decisions are mostly behind you. This is the point to confirm that what you contracted for is what was delivered-and that the home is safe, functional, and genuinely move-in ready on day one. With pre-construction, small discrepancies can hide in plain sight because everything is new and visually pristine. The walkthrough is where you slow down, verify methodically, and document with precision.
For many South Florida buyers, the purchase is also a second home or an investment, which raises the stakes. You may not be local to supervise post-closing repairs, and you may want to furnish immediately after closing. Whether you are closing in Brickell, Miami Beach, or along the oceanfront corridors north and south of Miami, the principle is the same: treat the walkthrough as a structured inspection of deliverables-not a celebratory showing.
What to do before you arrive (your leverage is strongest pre-closing)
The strongest walkthroughs are set up before you ever step into the unit.
First, re-read your contract package and attachments with a practical lens. You are not hunting for legal nuance. You are confirming what was promised in plain terms: finish schedules, appliance packages, ceiling heights where specified, balcony rail type, smart-home prewires, parking and storage assignments, and any buyer-selected upgrades or alternates.
Second, request the documents you’ll want at closing or immediately after: warranties, product manuals, finish and care guidelines (especially for natural stone), and any building orientation materials. Confirm who your post-closing service contact is and exactly how warranty claims are handled.
Third, align the right people. If you are represented, your agent should be present to keep the process moving and translate concerns into clear, written requests. If your schedule allows, consider bringing a professional inspector for a “new construction” inspection. Even in luxury product, third-party eyes add value because they are unemotional and methodical.
Finally, control the timing. A rushed late-afternoon walkthrough is where details get missed. Schedule when you can use daylight, and confirm in advance that utilities are active. Without running water, HVAC, and powered outlets, you cannot fully verify performance.
What to bring: a discreet kit that changes outcomes
A walkthrough doesn’t require drama, but it does require tools. Bring:
-
Your selection sheets, plans, and any option confirmations.
-
A phone with ample storage and a charger or battery pack.
-
Painter’s tape or removable stickers to mark items discreetly.
-
A small flashlight for cabinets, closets, and mechanical areas.
-
A simple outlet tester, if permitted.
-
A notepad or punch-list app with room-by-room templates.
The goal is consistency. You’re creating a record that’s easy for the builder to action-and easy for you to verify later.
Start with the “systems tour” before the finishes
Luxury buyers naturally notice stone, millwork, and hardware first. Resist that instinct. Start with the systems that are expensive to diagnose after you move in.
HVAC and ventilation
Turn the system on, let it run, and listen. Confirm each thermostat zone responds. Check that supply and return vents are secure and that airflow feels balanced from room to room. In humid climates, pay attention to any musty odor, unusual condensation, or inconsistent cooling.
Water and drainage
Run every faucet, check hot and cold, and let water run long enough to confirm stability. Fill and drain tubs. Flush toilets multiple times. Look beneath sinks for moisture, and confirm shutoff valves are accessible.
Electrical and lighting
Test a representative selection of outlets in each room. Verify dimmers operate without flicker, and that lighting controls align with what you expected. If the residence includes integrated shades or smart-home features, confirm you receive the controls, instructions, and any required account transfers.
Windows, sliders, and balcony doors
Operate every window and door. They should glide, latch, and seal cleanly. Confirm screens where included. On balconies, verify railings are secure and consistent, and check door thresholds for clean transitions.
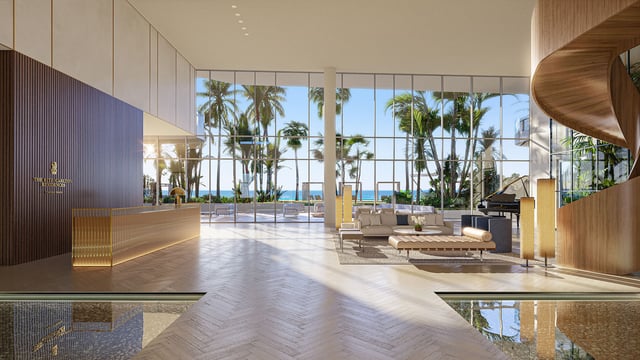
In newer coastal towers, the balcony can matter as much as the interior. Buyers considering glassy, view-forward product in places like Aria Reserve Miami often value the indoor-outdoor relationship, so door operation, drainage at the balcony edge, and finish transitions deserve extra scrutiny.
Then move to surfaces: what “acceptable” actually means
Once you’re confident the systems perform, shift to finishes with a luxury standard in mind. New does not mean perfect-but it should meet a reasonable, professional level of craftsmanship.
Floors and tile
Scan for lippage, chips at edges, hollow sounds, or inconsistent grout lines. With large-format tile, minor variance can read as “normal” to an installer but still look visually disruptive in a high-design residence. Photograph any patterns you consider unacceptable.
Walls, ceilings, and paint
Use angled light from a window or a flashlight to reveal waves, patches, or visible seams. Minor touchups are common, but persistent texture inconsistencies should be documented.
Millwork and cabinetry
Open and close every door and drawer. Check soft-close performance, alignment, and finish consistency. Confirm interior shelves are secure and that pull-out mechanisms glide smoothly.
Appliances
Confirm model numbers and finish. Open doors, check for damage, and ask whether protective film should remain until after move-in. If the building delivers a branded kitchen concept, be especially vigilant about matching the specified package.
If you are touring a design-driven tower in Brickell such as 2200 Brickell, small mismatches in hardware, cabinetry sheen, or appliance trim can undercut the intended aesthetic. Document with close-up photos and a wider shot that shows location.
The punch list: write it for the person who has to fix it
A punch list is not a complaint letter. It’s an instruction set.
Use a consistent structure for every item:
-
Location: building, unit, room, wall orientation.
-
Issue: what is wrong in objective terms.
-
Standard: what you expected (from selections, plans, or typical workmanship).
-
Evidence: photo or short video.
-
Desired outcome: adjust, replace, repair, repaint, reseal.
Avoid subjective language like “ugly” or “cheap.” Instead: “Scratched stainless on refrigerator door, right side, approx. 6 inches long,” or “Primary bath shower door binds at bottom track; does not close fully.”
When you mark items with tape, keep it discreet and minimal. The point is to help the repair team find the issue quickly-not to create a scene.
Confirm the non-obvious deliverables: storage, parking, and building access
High-end condo ownership is also about logistics.
-
Verify parking assignment and access method (transponder, QR, key fob).
-
Confirm any storage cage or private storage location and condition.
-
Confirm mail and package procedures.
-
Verify elevator reservation rules for move-in and large deliveries.
-
Ask how to coordinate with building staff for furniture installs.
In boutique coastal buildings like 57 Ocean Miami Beach, operational details can be as important as finishes, because staffing, service standards, and move-in protocols shape day-to-day living.
Decide what is a “must-fix” before closing vs. a warranty item
Your objective is not to achieve perfection on the spot. Your objective is to protect your timeline and minimize post-closing friction.
Prioritize “must-fix” items that affect safety, water integrity, security, or basic function:
-
Active leaks or evidence of water intrusion
-
Non-functioning HVAC, outlets, or lighting circuits
-
Doors and windows that do not latch or seal
-
Major cracks, loose railings, or trip hazards
-
Missing contracted items or clear substitution concerns
Cosmetic items can be addressed after closing under warranty-but only if you’re comfortable with the process and timeline. In practice, the more you resolve pre-closing, the better, especially if you’ll be traveling or coordinating furnishings. Oceanfront owners at properties like 2000 Ocean Hallandale Beach often plan installations quickly to enjoy the season, so protecting the move-in schedule is part of the walkthrough strategy.
Reinspection and sign-off: get clarity on the sequence
Before you leave, confirm the sequence from punch list to resolution.
Ask:
-
Who receives the list, and in what format?
-
When will you receive an itemized response?
-
How will access be handled for repairs if you are not present?
-
Will there be a formal reinspection, and who attends?
-
What constitutes completion: visual sign-off, functional test, or both?
If you are asked to sign an acknowledgment at the walkthrough, read it carefully. An acknowledgment of items observed is normal. A document that waives rights or implies acceptance of unresolved issues should be escalated to your counsel.
Protecting the finish after walkthrough: your first 30 days
Once you take possession, preserve the residence as if it were still on display. The reason is simple: you want a clean warranty record.
-
Photograph the unit immediately after closing, room by room.
-
Keep packaging, manuals, and serial numbers.
-
Use felt pads, protect floors during moves, and avoid harsh cleaners.
-
Log any performance issues early and in writing.
Luxury materials can be durable, but they can also be unforgiving if treated casually. A disciplined first month protects your investment and keeps conversations with the builder focused on workmanship rather than wear.
FAQs
-
Should I bring an inspector to a pre-construction final walkthrough? If time allows, yes. A new-construction inspection can catch functional issues that are easy to miss during a standard walk-through.
-
What is the difference between a walkthrough and an inspection? A walkthrough verifies delivery and documents issues; an inspection is a deeper technical evaluation of condition and performance.
-
Can I refuse to close if the punch list is long? It depends on the contract and the severity of issues. Material defects and missing items carry more weight than cosmetic touchups.
-
How detailed should my punch list be? Extremely specific. Clear location, objective description, and photos reduce delays and disputes.
-
What are the most critical items to test in South Florida? Water integrity, HVAC performance, window and door operation, and bathroom drainage should be prioritized.
-
Is cosmetic damage to appliances a big deal? In luxury product, it matters. Document it immediately and request replacement or repair before it becomes a wear-and-tear debate.
-
Do I need to test every outlet and switch? Ideally, yes. At minimum, test a representative set in each room and verify that all key circuits and dimmers function.
-
What if the unit looks different from the model? Models can include upgrades and staging. Compare against your signed selections and specifications-not the showroom styling.
-
Should I accept temporary fixes? Temporary measures are acceptable only if they are documented with a permanent-solution timeline and a confirmed reinspection plan.
-
How soon should I submit warranty requests after closing? As soon as you notice issues. Early documentation keeps responsibility clear and speeds resolution.
For a tailored shortlist and next-step guidance, connect with MILLION Luxury.

Million Luxury
Million Luxury
Welcome to MILLION, an exclusive luxury real estate boutique nestled in the heart of South Florida’s most desirable locations. Specializing in high-end properties, we provide a sanctuary for discerning clients including top Fortune 500 executives, affluent families, celebrities, and professional athletes from across the globe. At MILLION, we understand the unique demands of our elite clientele and offer a seamless blend of confidentiality and personalized attention. Our commitment to privacy is unwavering; we ensure that every transaction and interaction is handled with the utmost discretion and according to stringent confidentiality protocols. Our concierge service embodies the pinnacle of white-glove care, offering tailored assistance that transcends traditional real estate support.